
Flush water heater regularly to keep it running efficiently and extend its lifespan. Over time, sediment builds up in the tank, reducing heating efficiency and increasing energy bills. Follow these seven effective steps to flush water heater and maintain optimal performance.
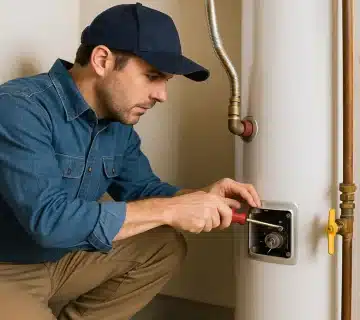
1. Flush Water Heater by Turning Off the Power and Water Supply
Safety comes first. Turn off the power supply to your water heater. For electric heaters, switch off the circuit breaker. For gas heaters, turn the thermostat to the “pilot” setting. Then, shut off the cold water supply valve at the top of the heater.
2. Allow the Water to Cool Before You Flush Water Heater
Hot water can cause burns, so let the water inside the tank cool down for a few hours before proceeding. Alternatively, run hot water from a faucet for a few minutes to speed up the cooling process.
3. Connect a Hose to Flush Water Heater Through the Drain Valve
Locate the drain valve near the bottom of the tank and attach a garden hose. Ensure the other end of the hose is placed in a safe drainage area, such as a floor drain, bucket, or outdoor location, as the water may contain sediment.
4. Flush Water Heater Tank by Draining It Fully
Open the drain valve to allow the water to flow out of the tank. Turn on a hot water faucet in your home to help release pressure and allow the tank to empty more efficiently. Watch for sediment as the water drains—it’s a sign of buildup.
5. Flush Water Heater to Remove Sediment
With the drain valve still open, turn the cold water supply back on briefly to flush out remaining sediment. The incoming water will stir up the sediment, helping to remove it. Repeat this step until the water runs clear. This ensures that your water heater is completely free of debris, improving its overall performance.
6. Close the Drain Valve and Refill the Tank After Flushing
Once the tank is clear of sediment, close the drain valve tightly. Remove the hose and turn the cold water supply back on. Open a hot water faucet to allow air to escape as the tank refills. Proper refilling prevents air pockets and ensures smooth operation.
7. Restore Power After You Flush Water Heater and Check for Leaks
After the tank is full, turn the power back on. For gas heaters, set the thermostat to your desired temperature. Check around the drain valve and connections for leaks. If you notice any, tighten the fittings as needed. This final step ensures your water heater is ready for use without any issues.
Why You Should Flush Water Heater Regularly
Regularly flushing your water heater offers several benefits:
- Improves Efficiency: Removing sediment helps the heater work more effectively, reducing energy usage.
- Extends Lifespan: Preventing sediment buildup minimizes wear and tear on the system.
- Ensures Consistent Hot Water: A clean tank heats water faster and maintains a steady supply.
- Reduces Maintenance Costs: Regular flushing can help you avoid costly repairs down the line.
For more information, check out our blog.
How Often Should You Flush Water Heater?
Experts recommend flushing your water heater at least once a year. However, if you live in an area with hard water, consider doing it every six months to prevent excessive sediment buildup. Regular maintenance is key to avoiding inefficiency and breakdowns.
Find Value Water Heaters Near You
Looking for professional water heater services? Visit us at one of our locations:
Taking the time to flush water heater is a simple yet effective way to maintain its performance and efficiency. Follow these seven steps regularly, and you’ll enjoy reliable hot water while saving on energy costs and extending the life of your water heater.
For more details, visit our official blog.

